Introduction
I’ll walk through building a custom portable altar box out of solid walnut wood. This altar features precisely cut joinery, two lids engraved via laser with sacred symbols, and a stunning natural finish. For those short on time, the completed altar and engraving plans/files are available for purchase.
Materials Needed (if making your own)
- 1 ash slab
- Router and router table
- Box joint jig
- Wood glue
- Wood finish materials
- Brusso hinges
- Laser engraver + engraving design files
- Sandpaper
Short Instructions
- Mill the ash into pieces sized for the box sides, base, and lids.
- Cut corresponding box joints for the sides with a router jig.
- Laser engrave lids
- Glue box together, attach base, sand, and finish the wood.
- Install hinges and line box interior. Add ritual objects.
For those short on time, the completed walnut altar box and SVG engraving files are available for purchase. This allows you to benefit from the altar’s handcrafted quality and precisely engraved lids without the time investment.
The altar box plans and SVG files are also available separately. This is perfect if you want to engrave your own lids but don’t have time to construct the entire box yourself.
The Highlights
The slab was purchased locally from Groff and Groff Lumber. I purchased a simple ash slab so long ago I forget what it cost me. The slab was milled down into boards and jointed and planed using tools from FB marketplace. As this was my first box, I did not make this as a band saw box where you build the box closed and saw the lid off. Sanding the top to meet the bottom took some work and I will make future boxes using the band saw method. All three lids (top, bottom and interior) were simple glue ups from the same original slab.
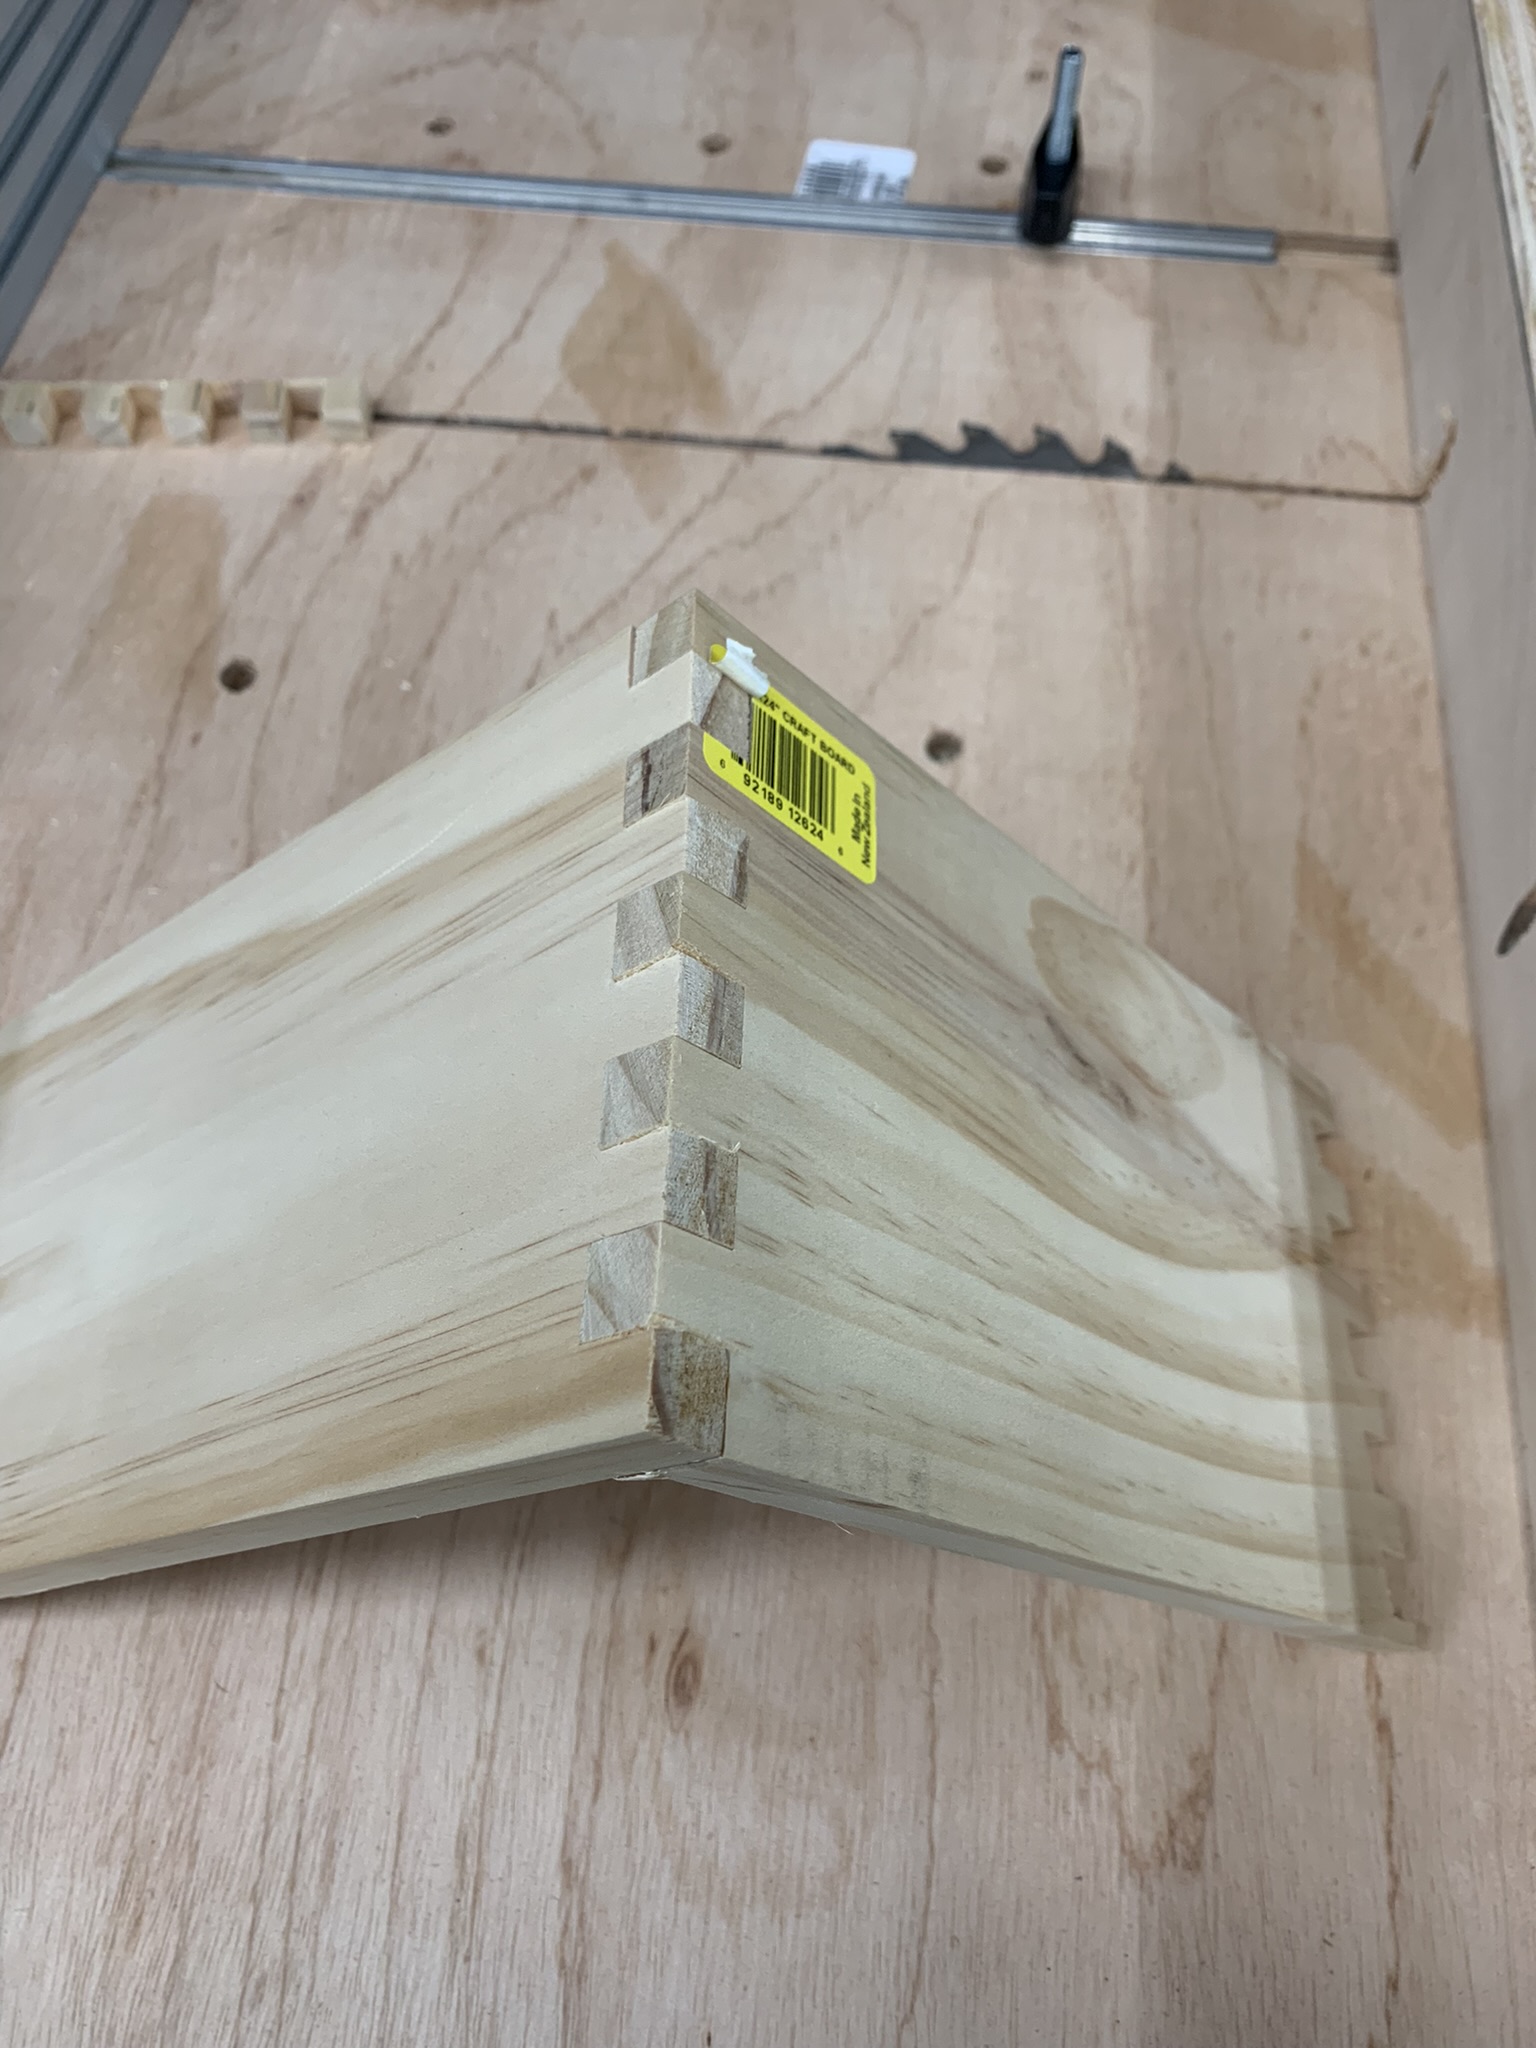
I purchased a box joint jig from Rockler and made a few test joins (see pics above). Once that was dialed in I cut the joinery for the lid and the base box. After some test fits and sanding, I moved over the laser engraver to work on the lid designs.
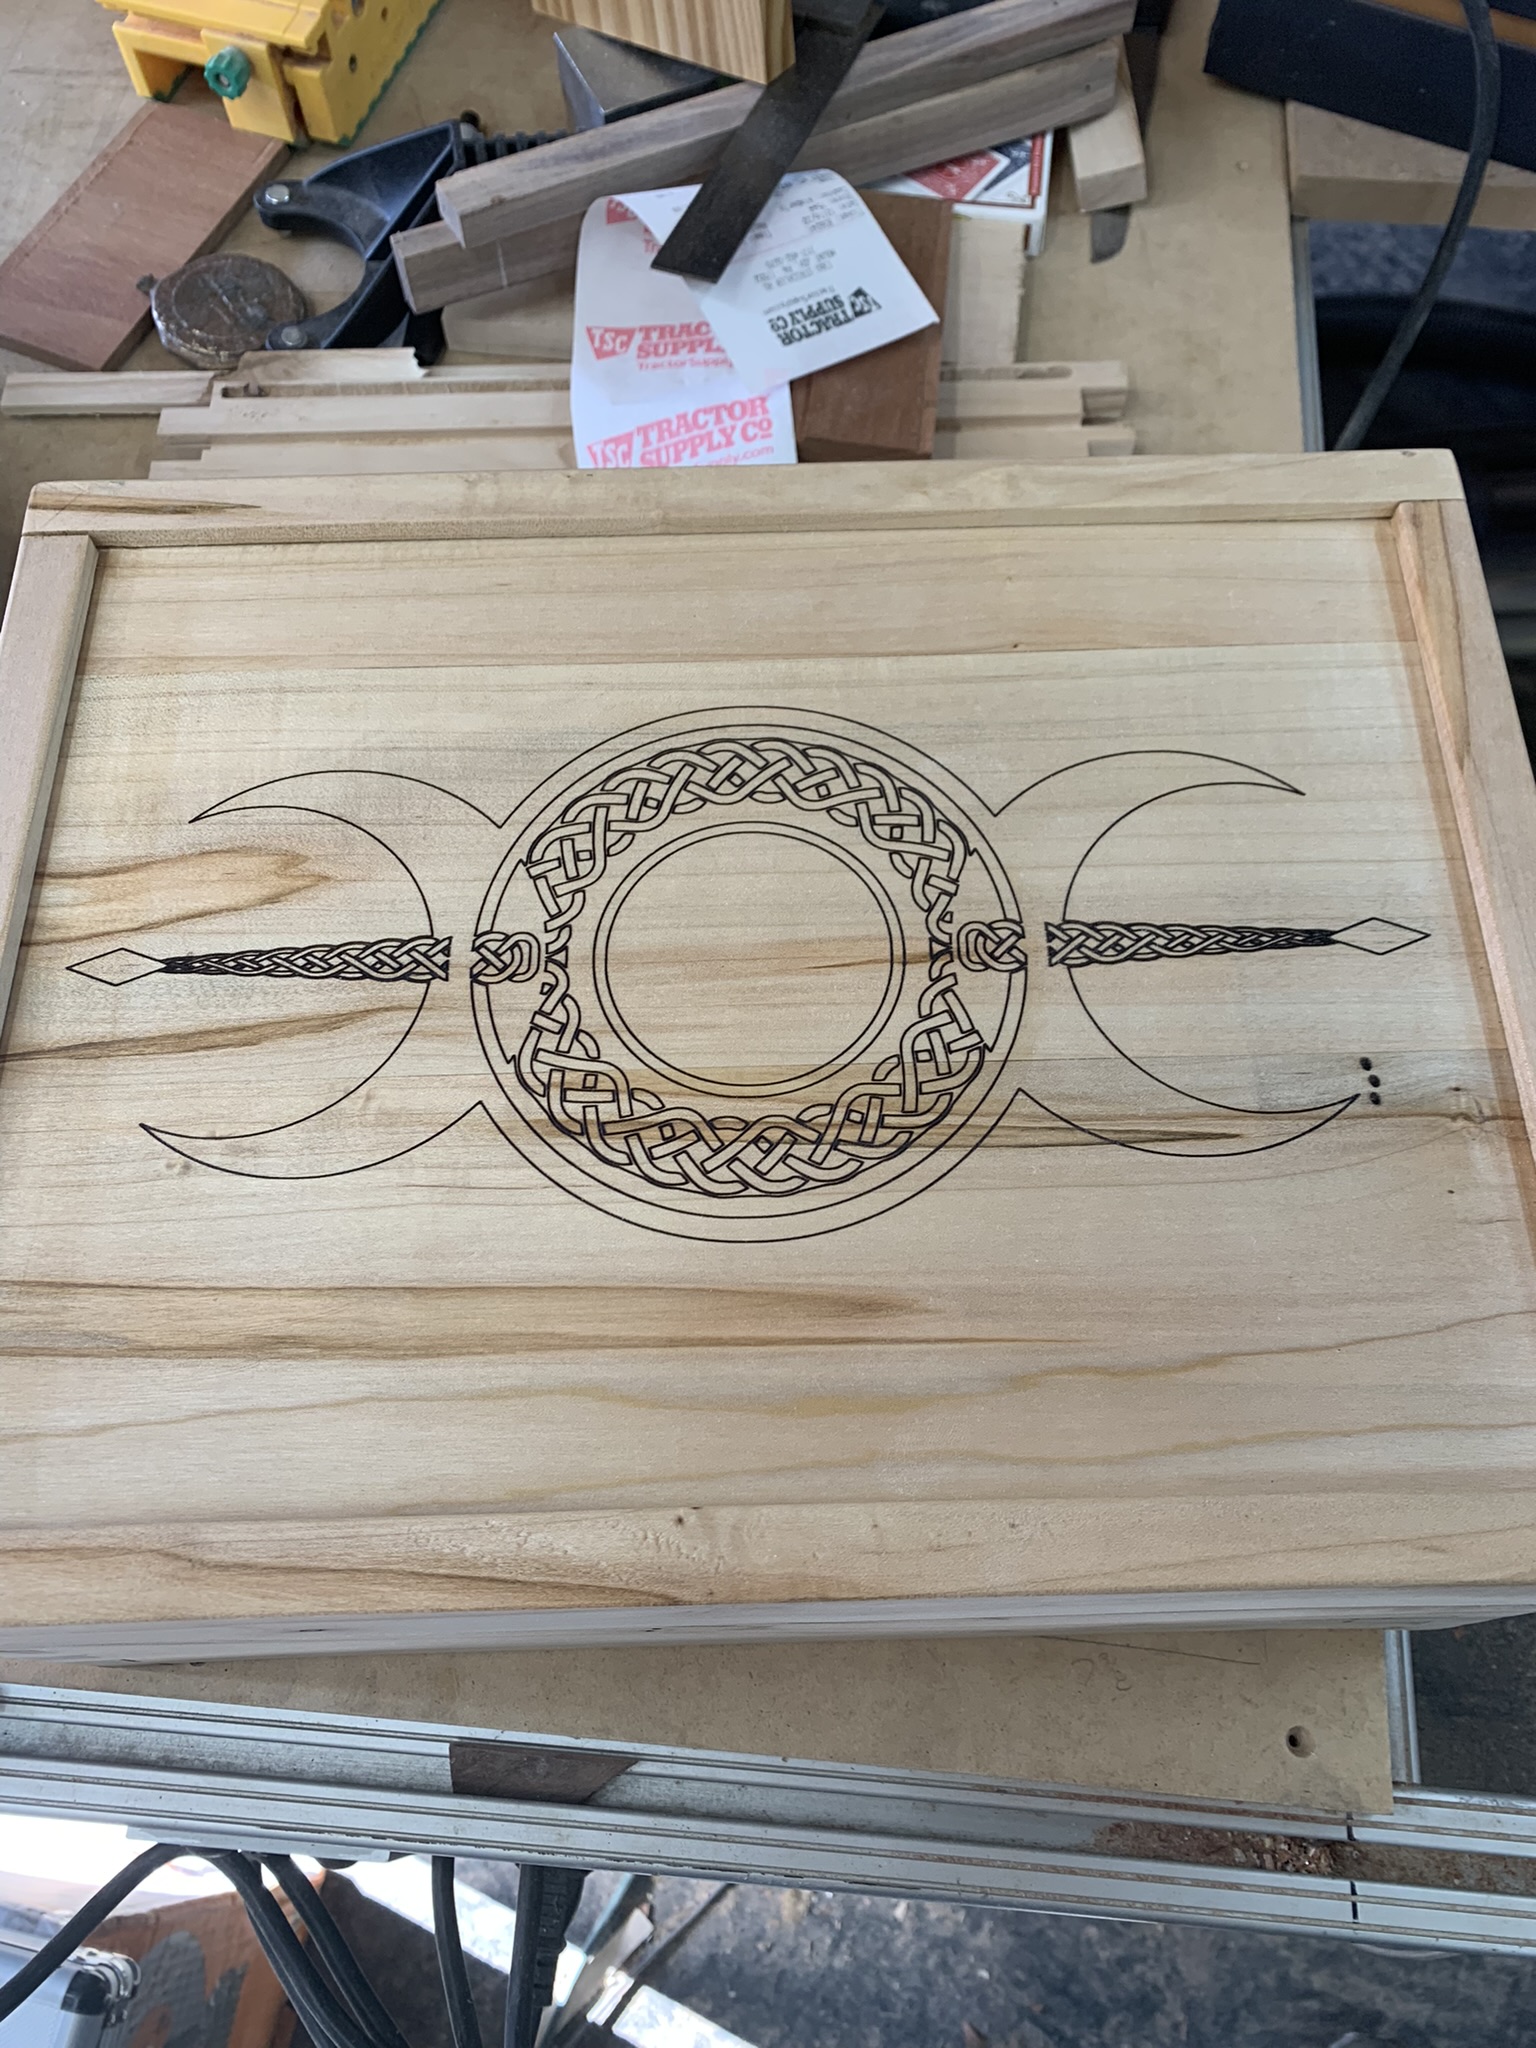
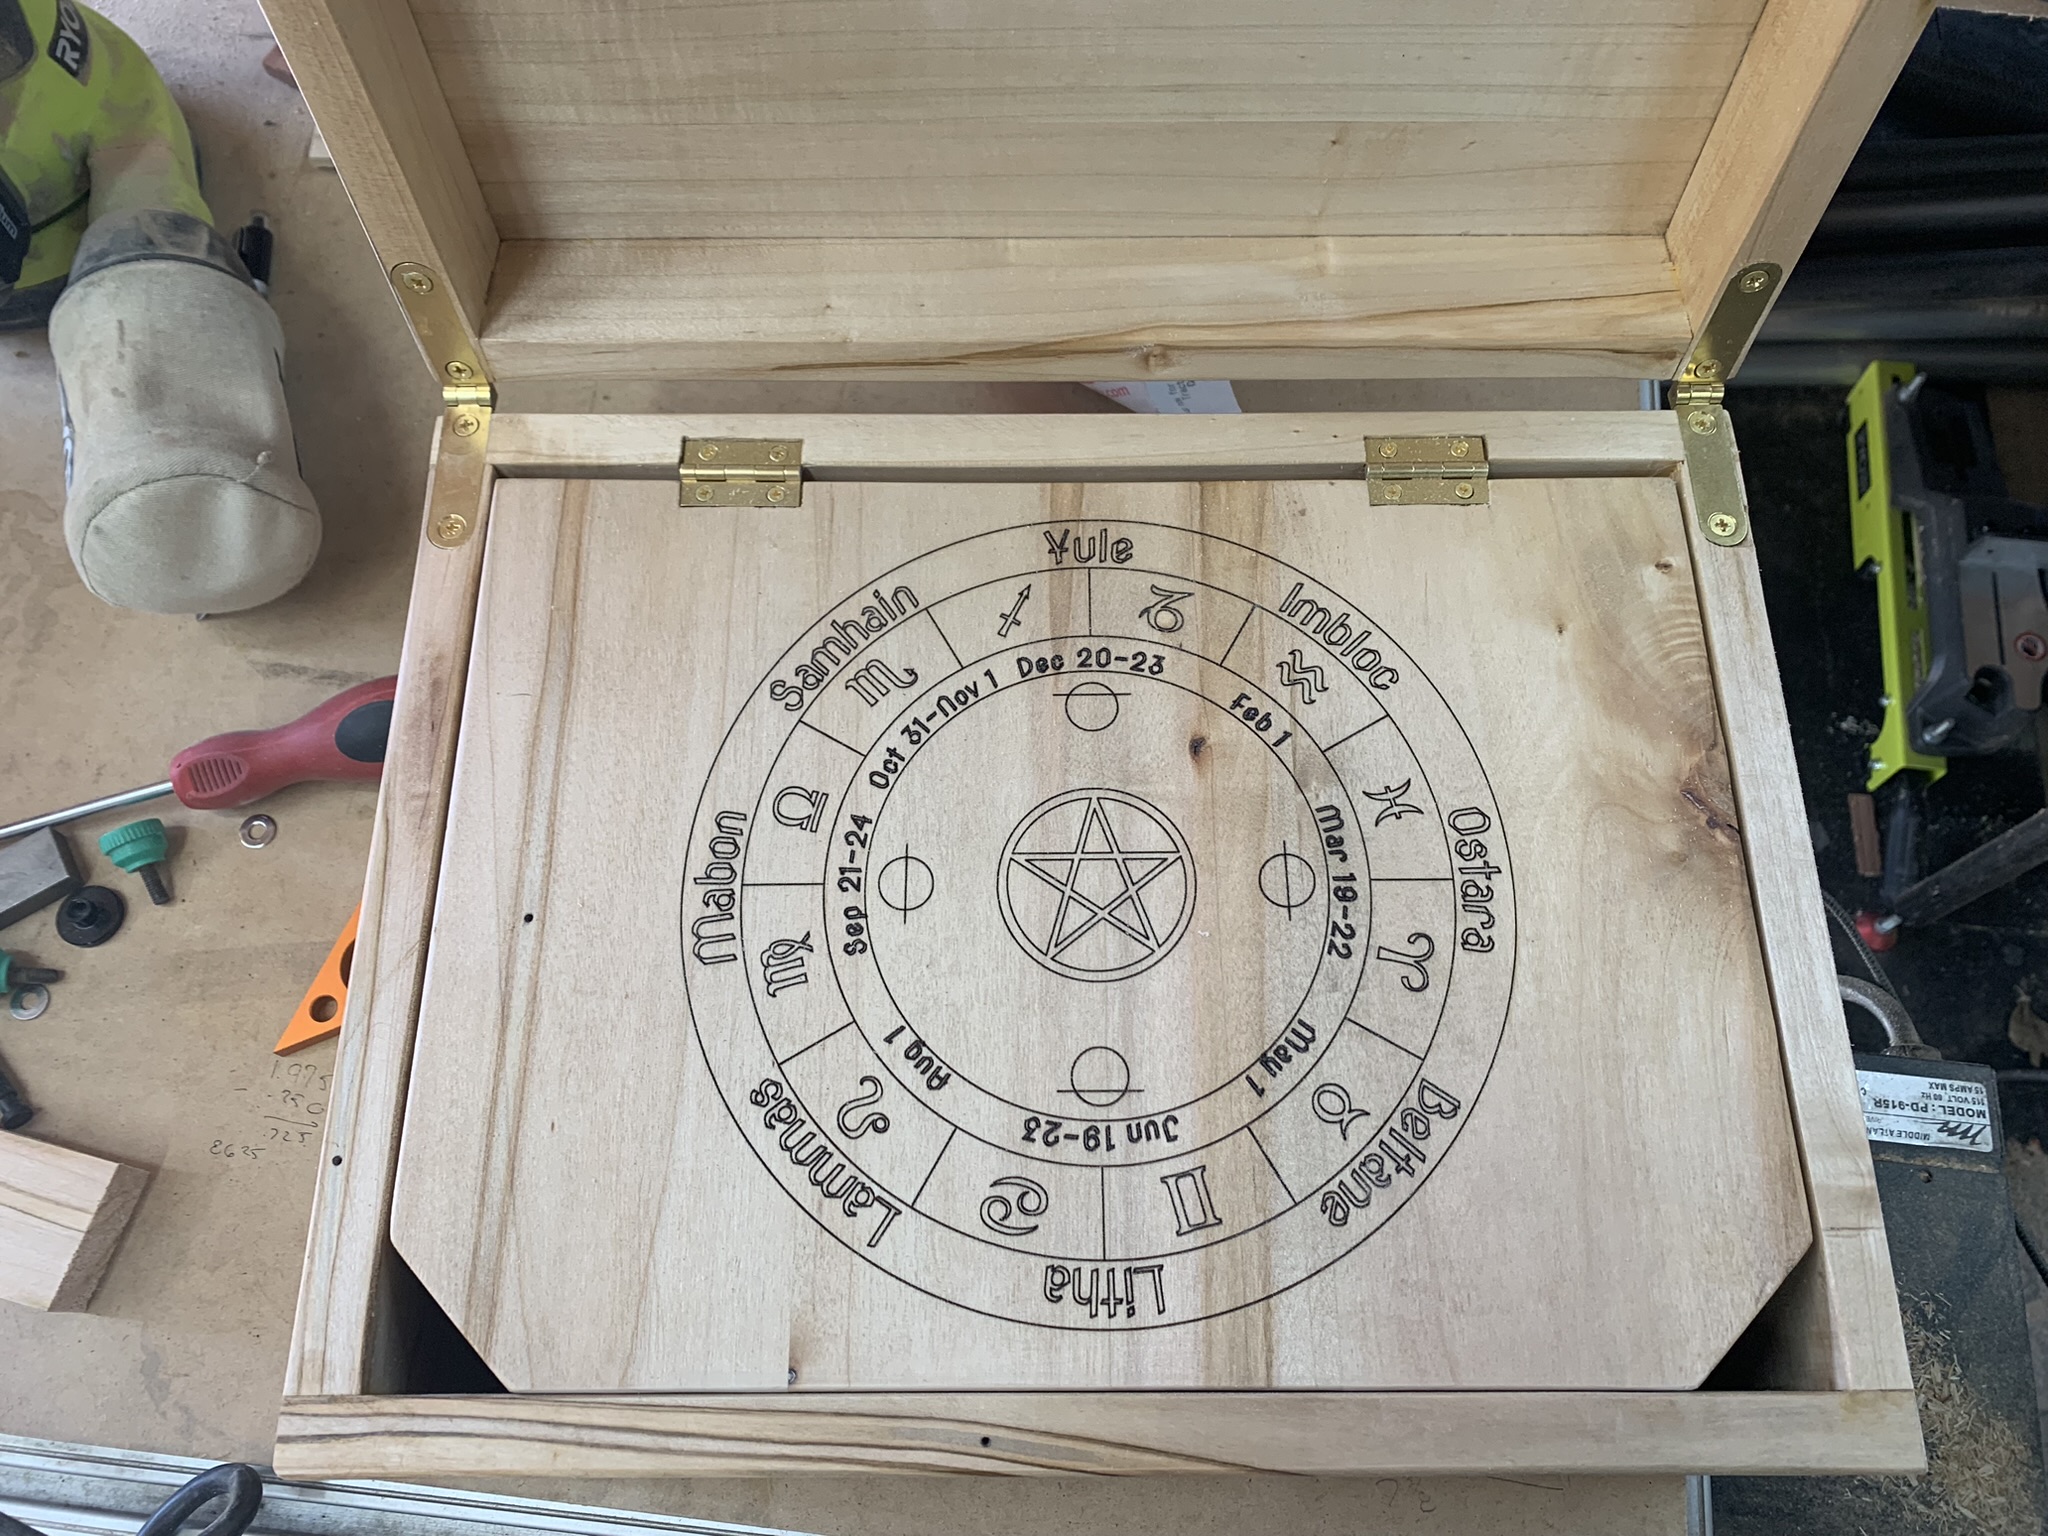
The top lid design the Triple Goddess design I purchased from 123rf.com. The interior calendar is a standard Pagan calendar design I’ve seen around the internet. The one used for this project was partially created by me in Vectric’s vCarve software. A quick shout out to Vectric. Their customer service is amazing. I don’t have a background in design or working in 2D or 3D. I’m still learning their software and all it can do (another blog post on that later). The zodiac signs come from Design and Make. After a lot of trial and error, I got the final design assembled and moved over to Lightburn.
You might be asking why I didn’t just start in Lightburn? Simple. My first plan was to carve this into the wood and do resin or wood inlay. Unfortunately my skills are not there yet – so laser it is.
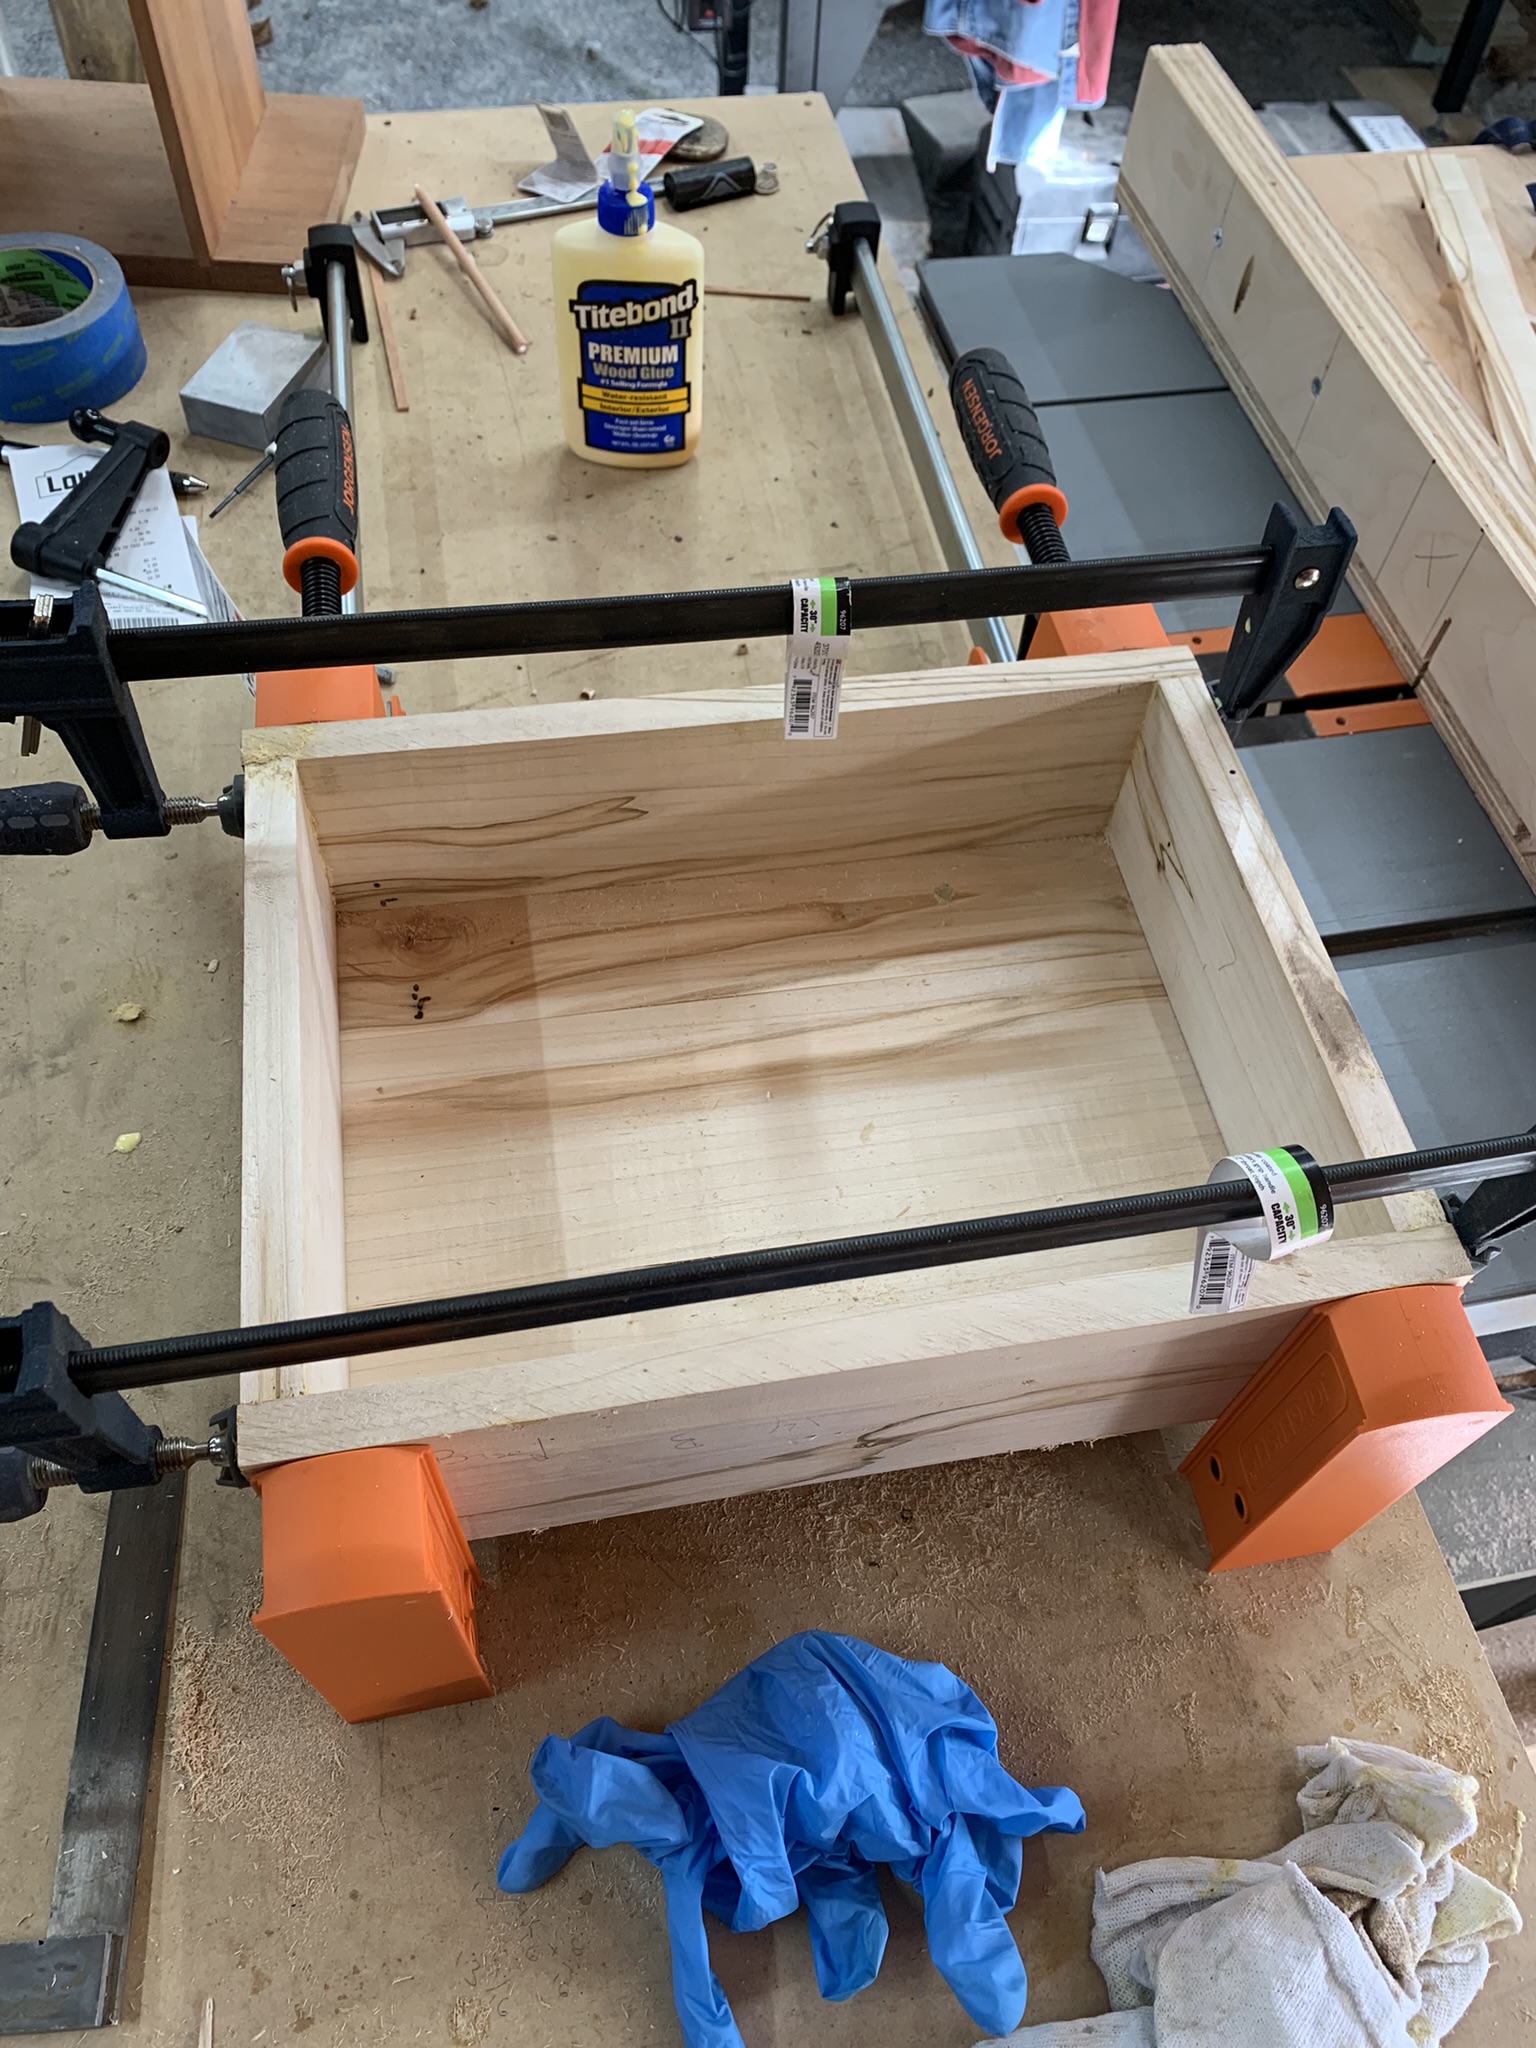
Once everything was dry fit, engraved and tested, I went ahead and glued everything. As my first box project – things mostly came out square but some additional sanding was required to bring everything into order.
Conclusion
I learned a ton on this build and with the holidays around the corner, I need to get moving on a couple orders. I’m looking forward to another opportunity to build this again and make fewer mistakes. I’ll also do a better time documenting it for those that want to follow along.
I have included the last paragraph to show that this article started with AI courtesy of Claude AI. While the article started with AI – it merely provided some of the skeletal work. The meat of this was done by me. A human.
Please let me know if you would like any other details included or changed in this version of the post! I can continue revising to ensure it fully captures the altar construction process and purchasing options.
